Importing Business Data
MotorDesk's data import features allows for you to import any already existing contact/lead data for your business, straight into MotorDesk in 3 easy steps.
Step 1 : Navigate to import tool
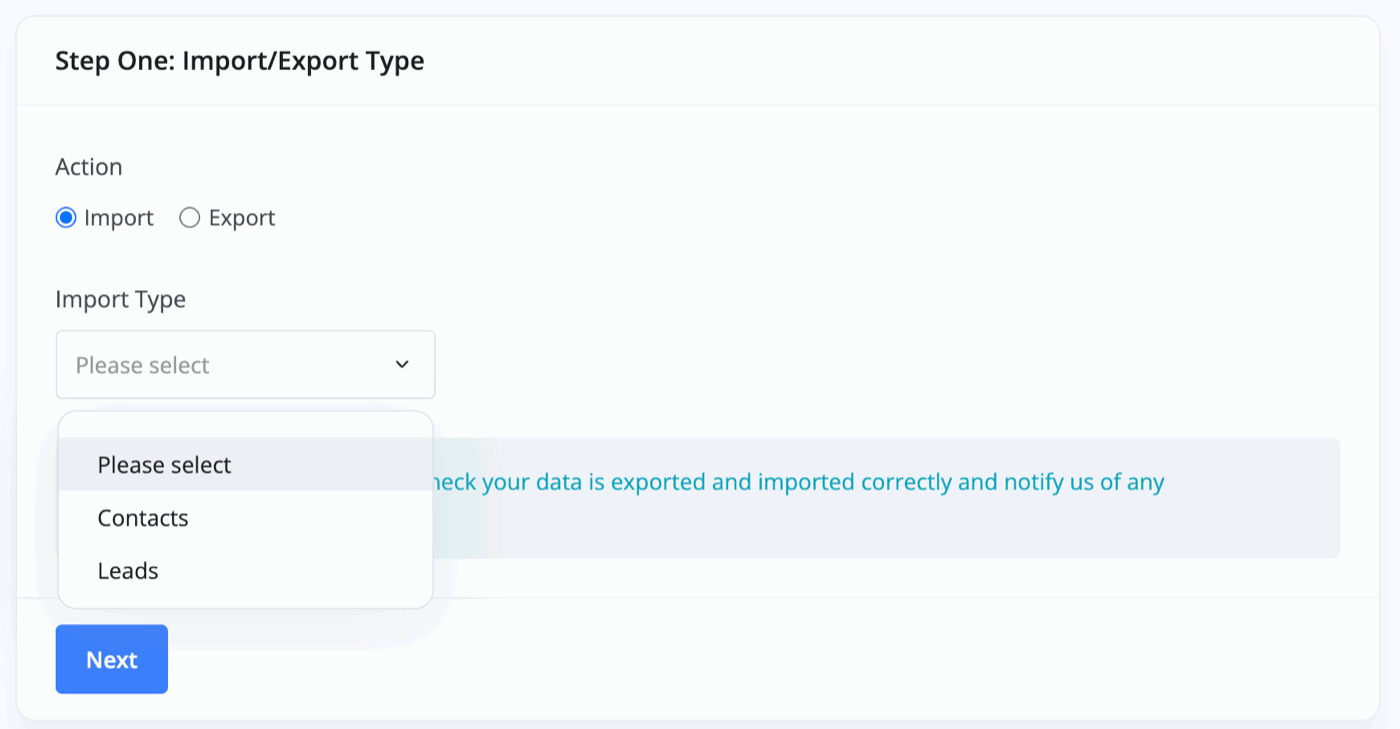
You can find the import/export tool in the Business -> Import and Export section.
You can then select 'Import' as the action, and then below you have a drop-down to select the type of import you would like to carry out, either:
- Contacts
- Leads
Step 2 : Upload file
At this stage, you will need to upload a CSV or Excel file of the contacts/leads that you'd like to import.
Depending on the type of data you are importing, this will determine the format you will have to have for that file and also the options you have for importing the data.
Contacts ImportContacts Required Headers - a template is available to be downloaded at this stage if needed.
- name
- company
- full_address
- address_line_one
- address_line_two
- city
- state
- zip
- country
- telephone
- mobile
- marketing
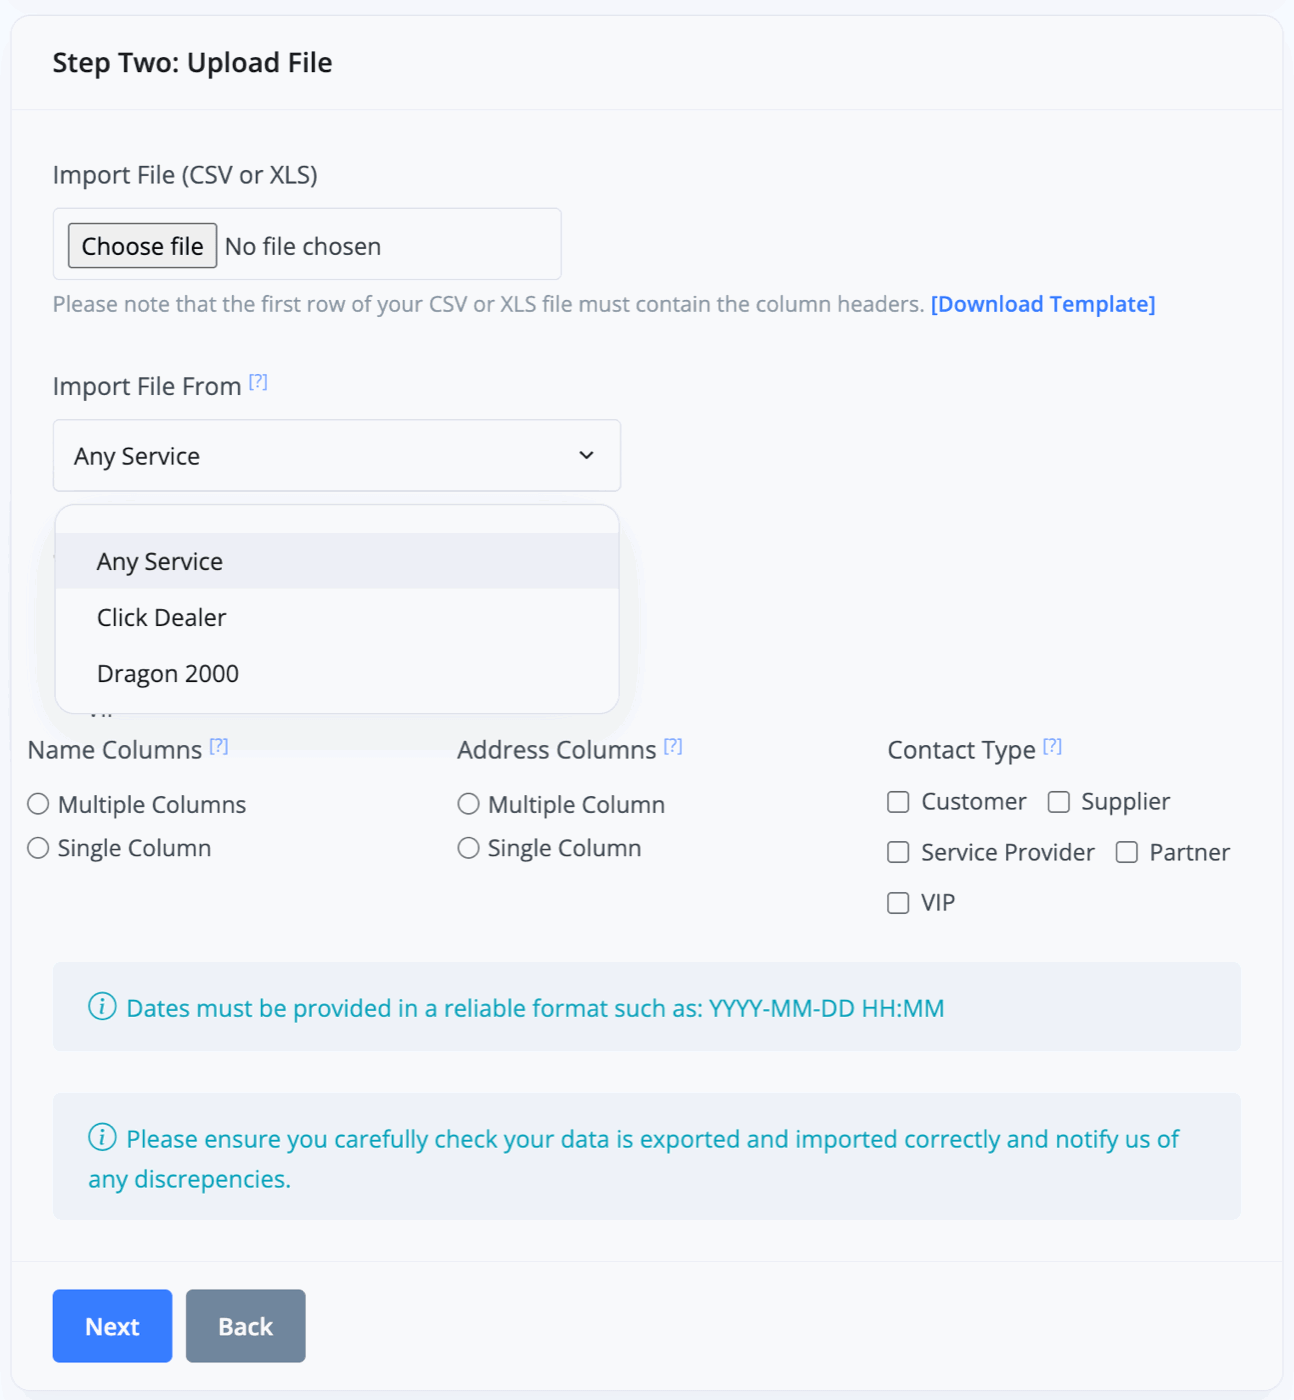
Import File From
Once you have uploaded your file with the correct format, the next option to select is the 'Import File From'. You have three choices to choose from here:
- Any Service
- Click Dealer
- Dragon 2000
These choices will configure how the import tool works, meaning if you are importing contacts from either Click Dealer or Dragon 2000, this should be a seamless process. For any other service, please select the 'Any Service' option.
Name & Address Columns
The next options to configure are the 'Name Columns' and 'Address Columns'.
If in your uploaded file the contact name is split between two columns, for example 'First Name' & 'Last Name', select multiple columns. This is the same for the address.
Contact Type
Finally, you will need to select the type of contact you are importing. Each imported contact will be labeled with this type within MotorDesk.
Leads Import
Leads Required Headers - a template is available to be downloaded at this stage if needed.
- type
- name
- phone
- mobile
- marketing
- source
- message
- date
- note
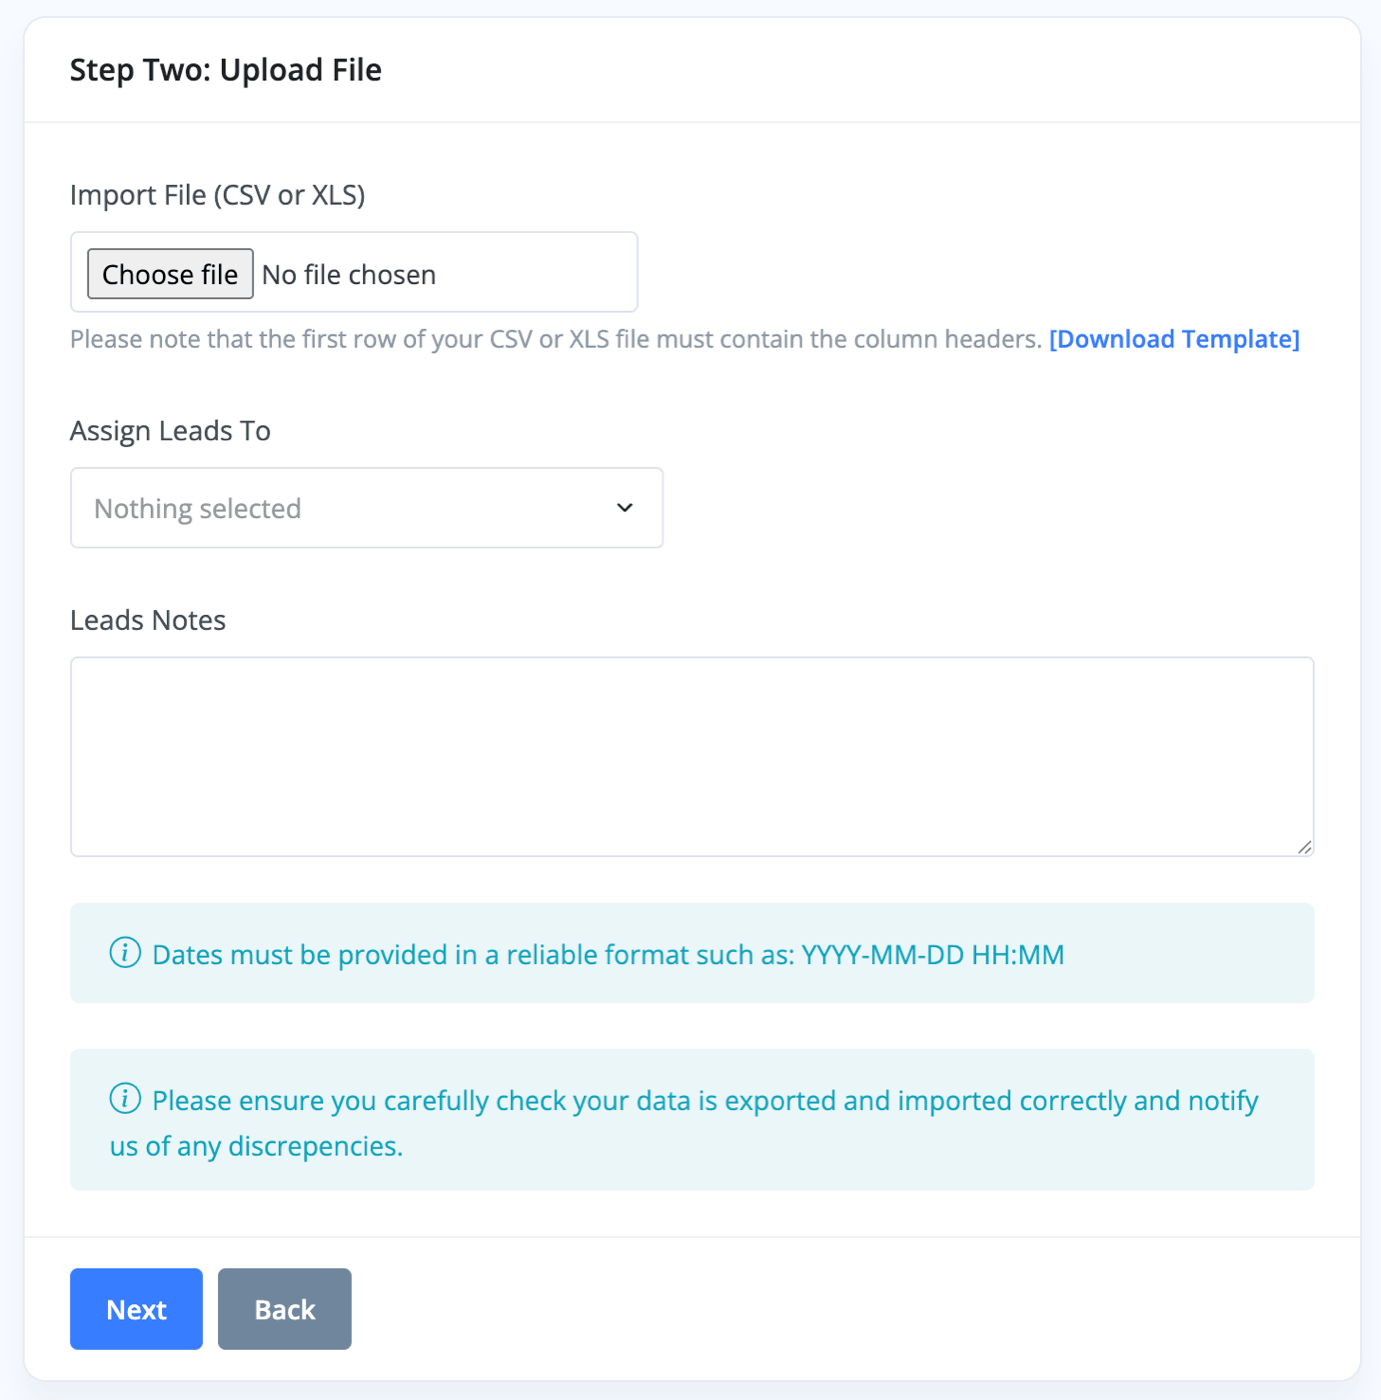
The first option to configure is 'Assign Leads To'. Selecting this will give you a list of your users/staff that have been added into your MotorDesk account. You can then select any number of these users to assign the leads to.
The last option to configure is 'Leads Notes'. You can enter any notes that you'd like attached to each of the imported leads.
Step 3 : Map fields
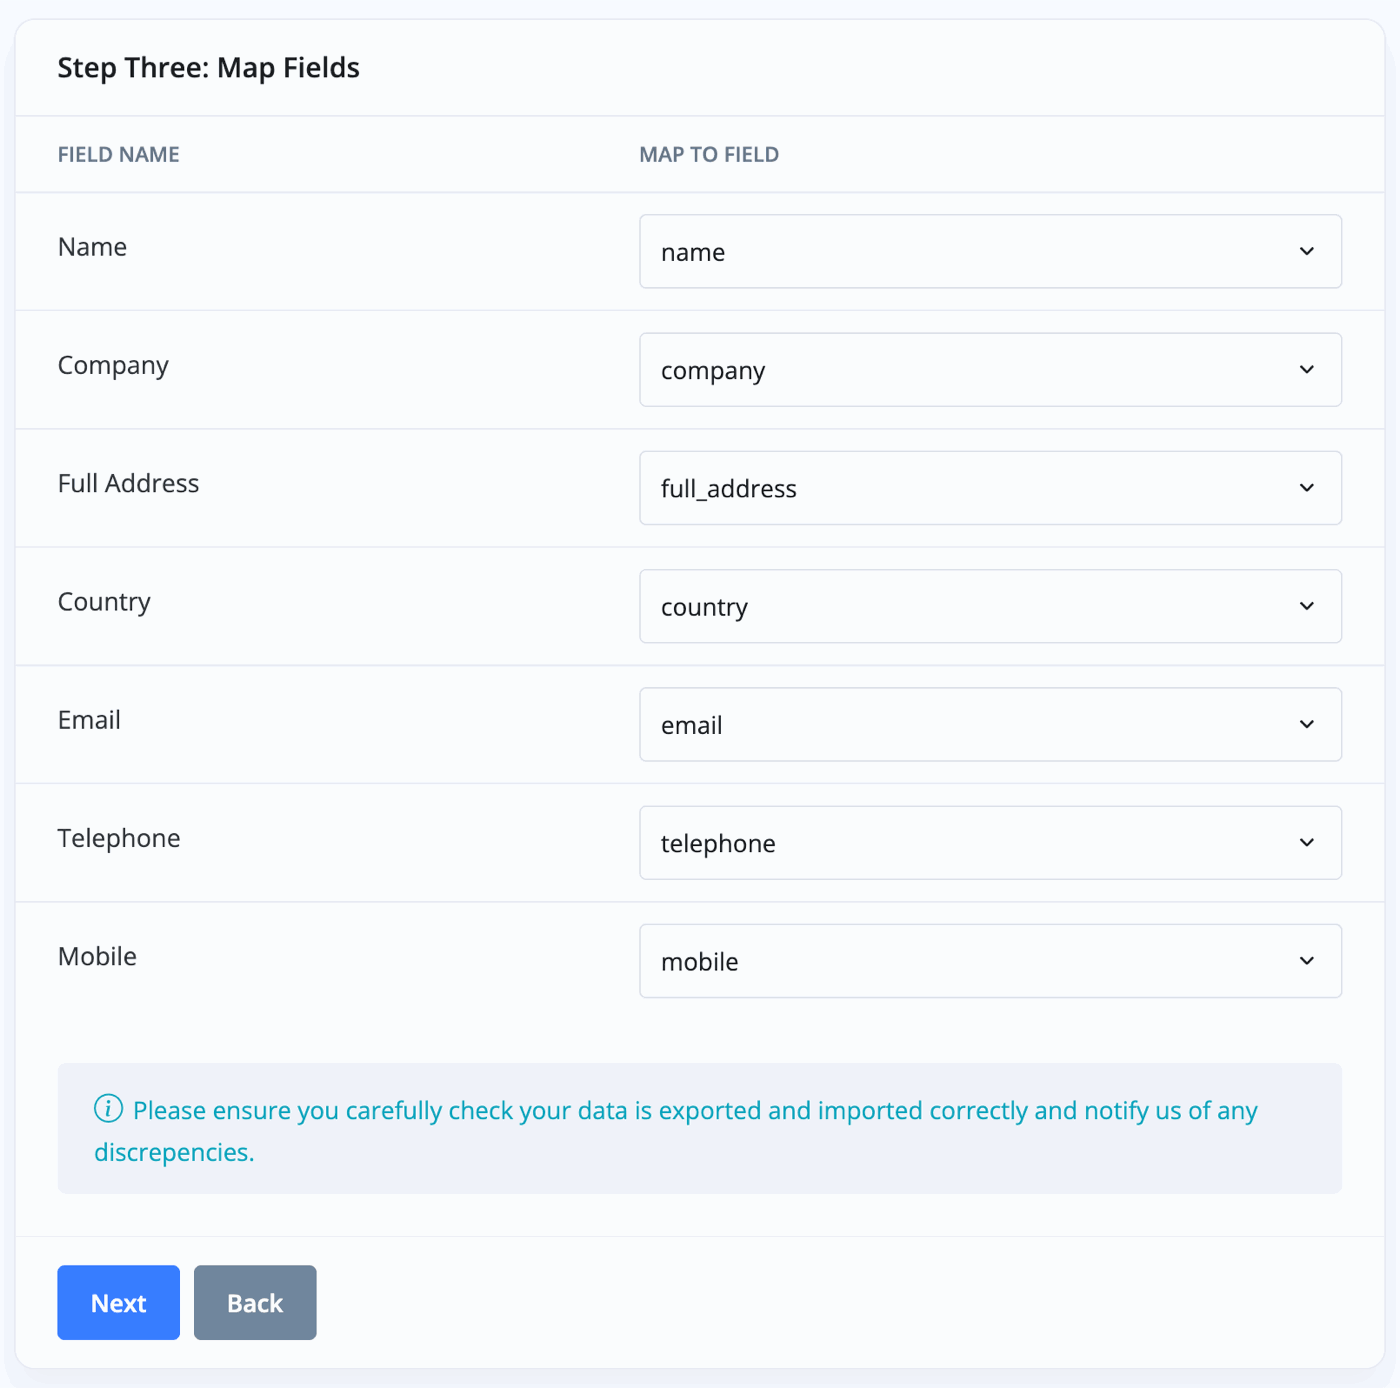
Depending on the type of import you have selected, you may see some different values in the 'Field Name' column, however both import types use the same idea here.
The 'Field Name' column is the fields that are used within MotorDesk, and what will be used when creating the contact/lead.
The 'Map To Field' column is the headers that were found in the file you uploaded. You will need to match your column headers with the field names on the left - this ensures that the correct data is being passed through to the correct fields.
Step 4 : Confirm import
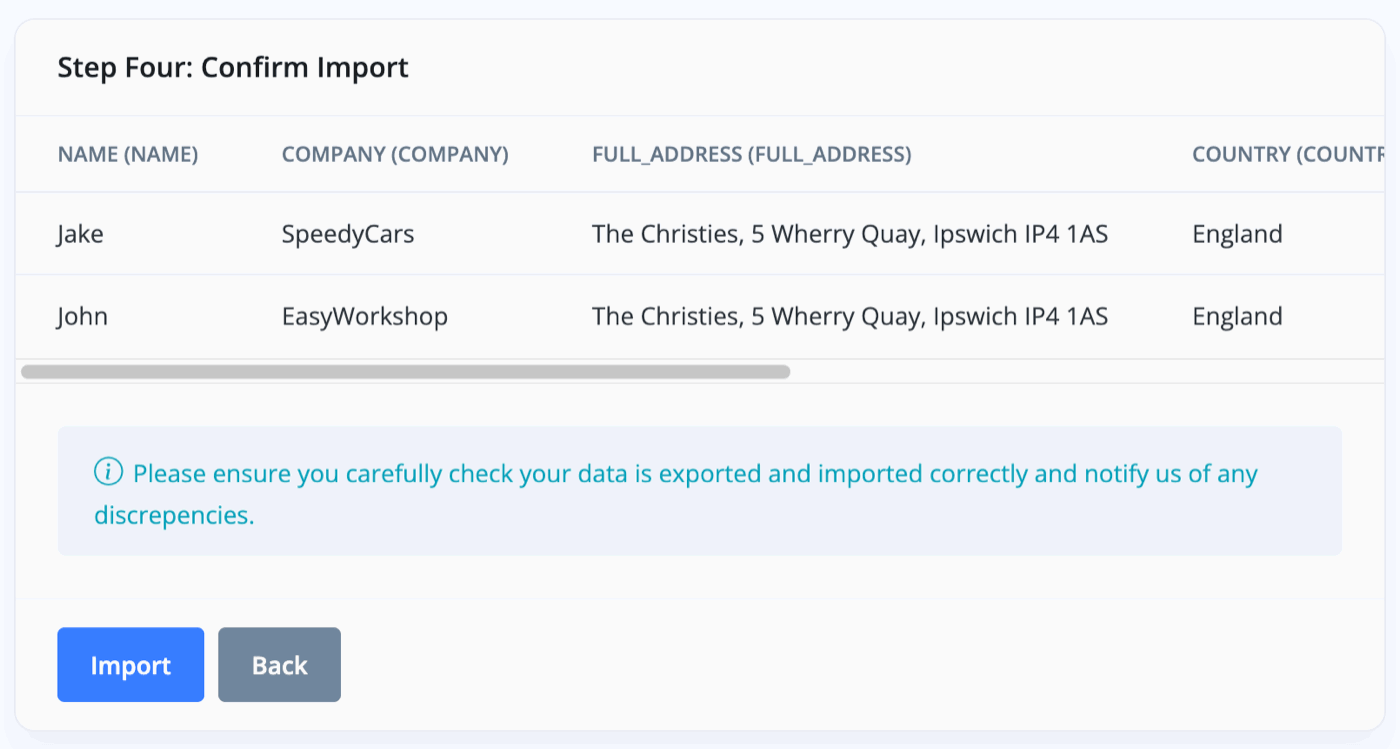
You will now be displayed a sub-set of the file you have uploaded - you can use this to confirm if you have mapped the fields correctly.
You can now click the blue 'Import' button to begin importing your data.
Step 5 : Import
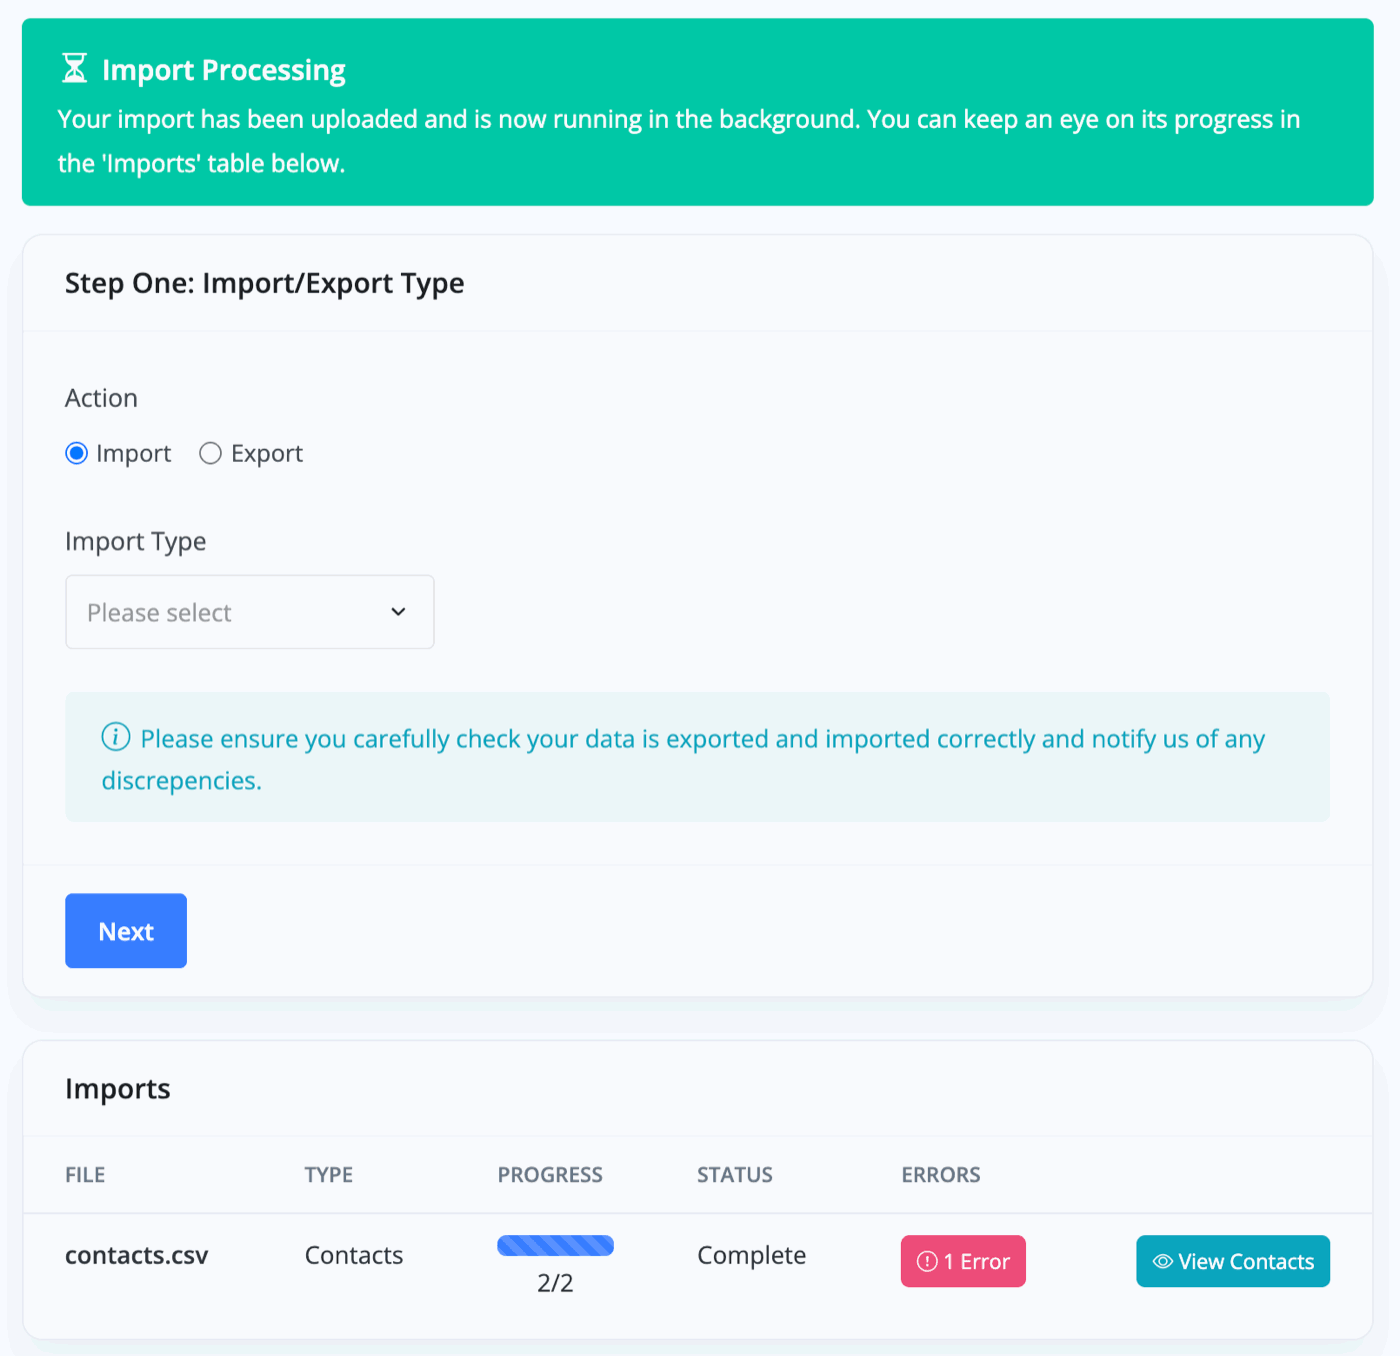
Your import will now be running in the background, and you are free to leave this page.
You will see a progress bar for your import that will update as more contacts/leads are imported in. You may also see errors highlighted for the import. Clicking on the red errors badge will present you with a pop-up that includes details about the errors that came up when importing your data.
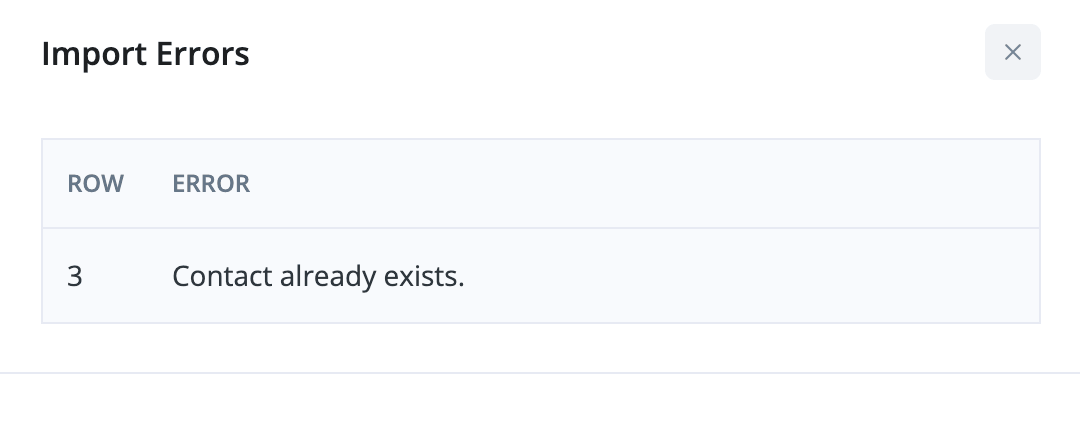
As you can see here, there was 1 error within my import, that being on line 3 I am trying to import a contact that already exists within my MotorDesk account. These errors do not indicate that the import has failed - just that select rows may not have been imported. You do not need to run the import again.
Related Documentation
Usage Guide
- Account Alerts & Sales Channel Error Notifications
- Adding & Managing Contacts (Customers & Suppliers)
- Adding A Vehicle
- Adding Appointments To Your Calendar
- Adding Pre-Defined Products & Services
- Adding Website Pages & Navigation Links
- Adding Website Tags
- Aftersales Invoices
- AI Lead Assistant
- AI SEO Search Results Explained
- Batch Invoice
- Booking Types & Website Booking Forms
- Branding Your Website
- Browse Vehicles
- Business Contact Details (Telephone & Social Media)
- Business Details (Address, Legal Name & Company Number)
- Business Follow-Ups - Automated SMS & Emails To Customers
- Business Opening Hours (and Holiday Closures)
- Business Social Networks
- Business Users & Roles
- Cancelling A Vehicle Sale or Reservation
- Changing Vehicle Registration (Number Plate)
- Changing Your Membership Plan
- Connecting Finance (iVendi, Codeweavers, CarFinance247 & Evolution Funding)
- Connecting Third-Party Services
- Creating Invoices (Simplified)
- Creating Invoices, Purchase Invoices & Orders
- Custom Website Categories
- Customer & Courtesy Vehicles
- Deal Builder
- Display A Different Business Address In MotorDesk
- Displaying Announcements With Website Banners
- Editing Auto-Generated Content In MotorDesk
- Editing Website Pages
- Exporting Business Data
- Filtering Junk Leads
- Handover Process
- Historic Data Viewer
- How MotorDesk Integrates with Sage, Xero & QuickBooks
- How to Add an AA Dealer Promise/Warranty Page
- How To Change Your Website Images
- How To Enable Online Reservations
- Importing Business Data
- Importing Your AutoTrader Stock
- Initial Website Set-Up & Picking A Website Template
- Invoice Customisation
- Membership Payments
- Membership Plans, Data Charges & Payments
- Navigating MotorDesk & Your Dashboard
- OCR (Automatic Invoice Reader) Help
- Remove A Vehicle
- Sales Leads & Chat
- Sales Reports
- Selling A Vehicle
- Selling Multiple Vehicles At Once
- Sending & Signing Documents
- Show Sold Vehicles On Website
- Taking Deposits & Part Payments In MotorDesk
- Un-Publish A Vehicle
- Updating Your Contact Details
- User Profile (Change Email & Password)
- Vehicle Analyser
- Vehicle Appointments
- Vehicle Check
- Vehicle Checklists
- Vehicle Competitors
- Vehicle Condition Reports
- Vehicle Details
- Vehicle Documents
- Vehicle Finance Invoices
- Vehicle History
- Vehicle Image Templates
- Vehicle Images & Videos
- Vehicle Import
- Vehicle Job Boards
- Vehicle Leads & Orders (Leads & Deals)
- Vehicle Locations
- Vehicle Optional Extras, Features & Descriptions
- Vehicle Overview
- Vehicle Photo Background Removal
- Vehicle Purchase & Costs
- Vehicle Quick Check
- Vehicle Reservations
- Vehicle Settings
- Vehicle Silent Saleman
- Vehicle Specification
- Vehicle Stock & Price
- Vehicle Test Drives
- Vehicle Workflows
- Vehicles For Sale Limit Reached
- Vehicles Settings
- Vehicles Stock Book
- Website AI SEO
- Website Banner Settings
- Website Blog Articles
- Website Customer Reviews
- Website Deal Builder Settings
- Website Header & Footer
- Website Live Chat Settings
- Website Settings
- Website Statistics
- Website Valuation Settings
- Website Vehicle Search Result Design