AI SEO Search Results Explained
When you enable 'Vehicle AI SEO', your website will be given a page that is structured like the example below. The primary function of this page is to boost your website's visibility in online searches by including keywords, internal links and FAQ sections, all generated automatically for you.
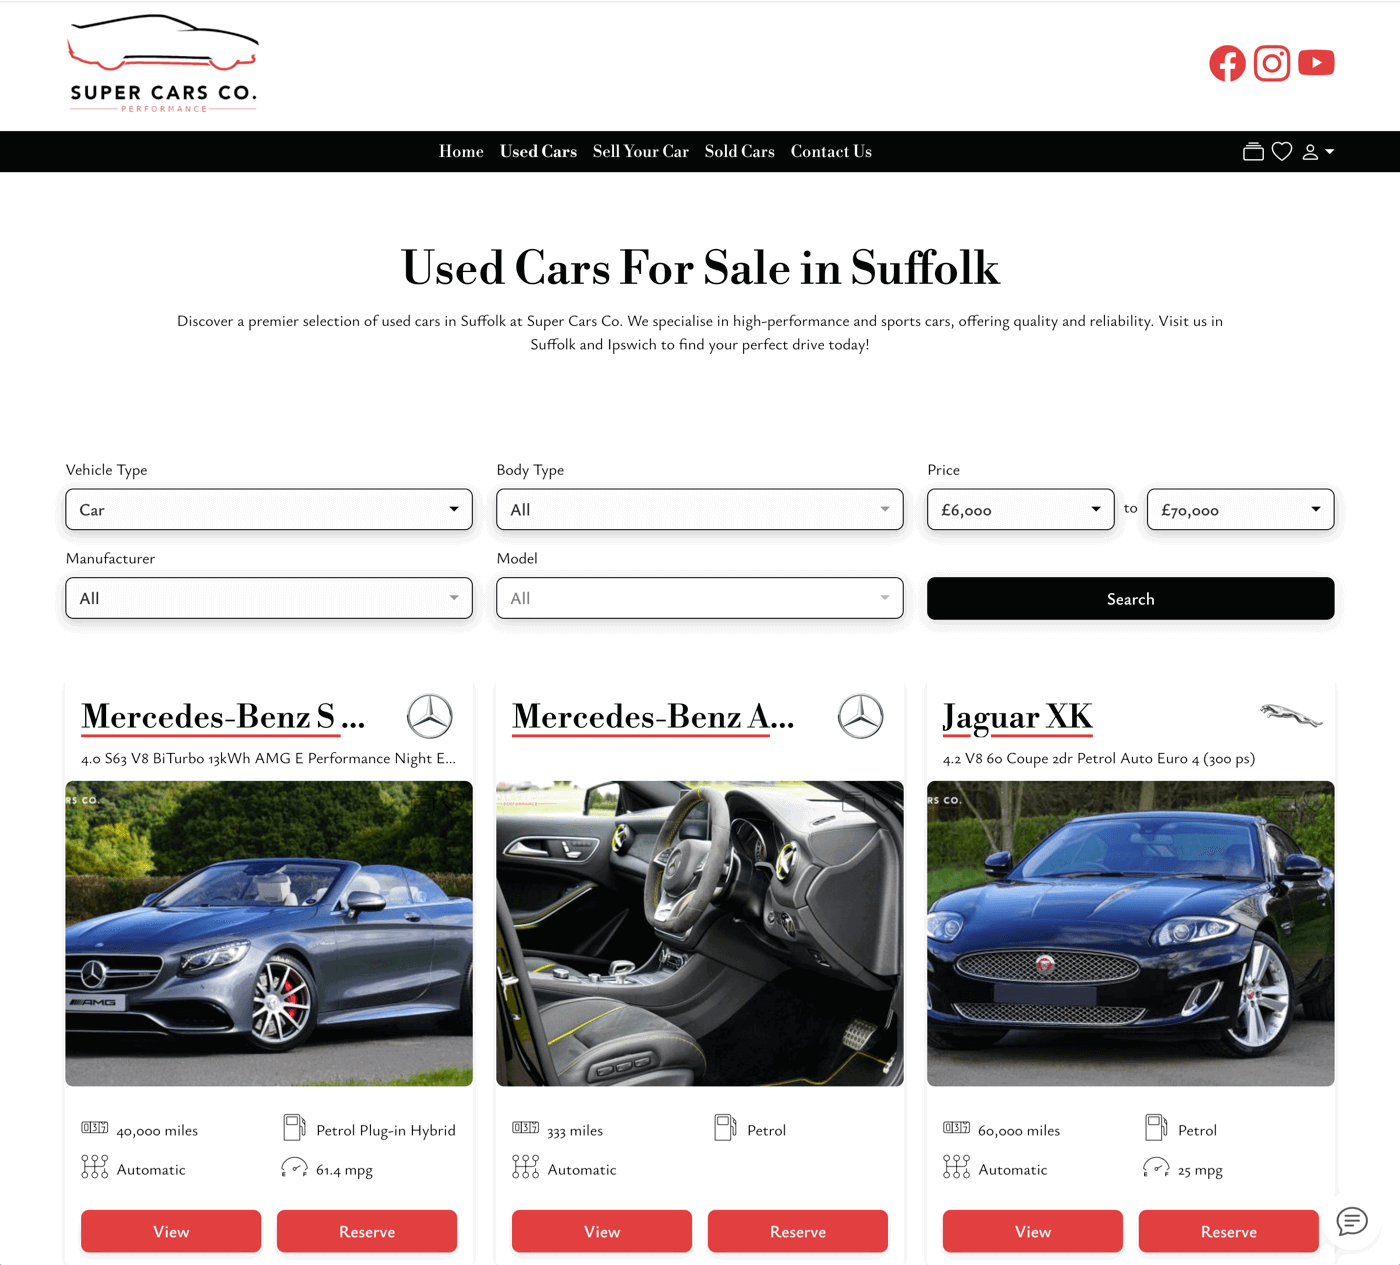
This does make this page act slightly differently from your other website pages, however. The first thing you will notice is that it is vehicle-type specific. For example, 'Used CARS For Sale' or 'Used VANS for Sale'. This is to better match common terms searched online by potential customers. This is also the reason that, if you stock both vans and cars, they won't both appear on this page.
Note: Of course, once you press 'Search', all vehicle types will appear in the search results.
Organise Your Vehicle Types
You can avoid any confusion by splitting the different search pages in the navigation bar.
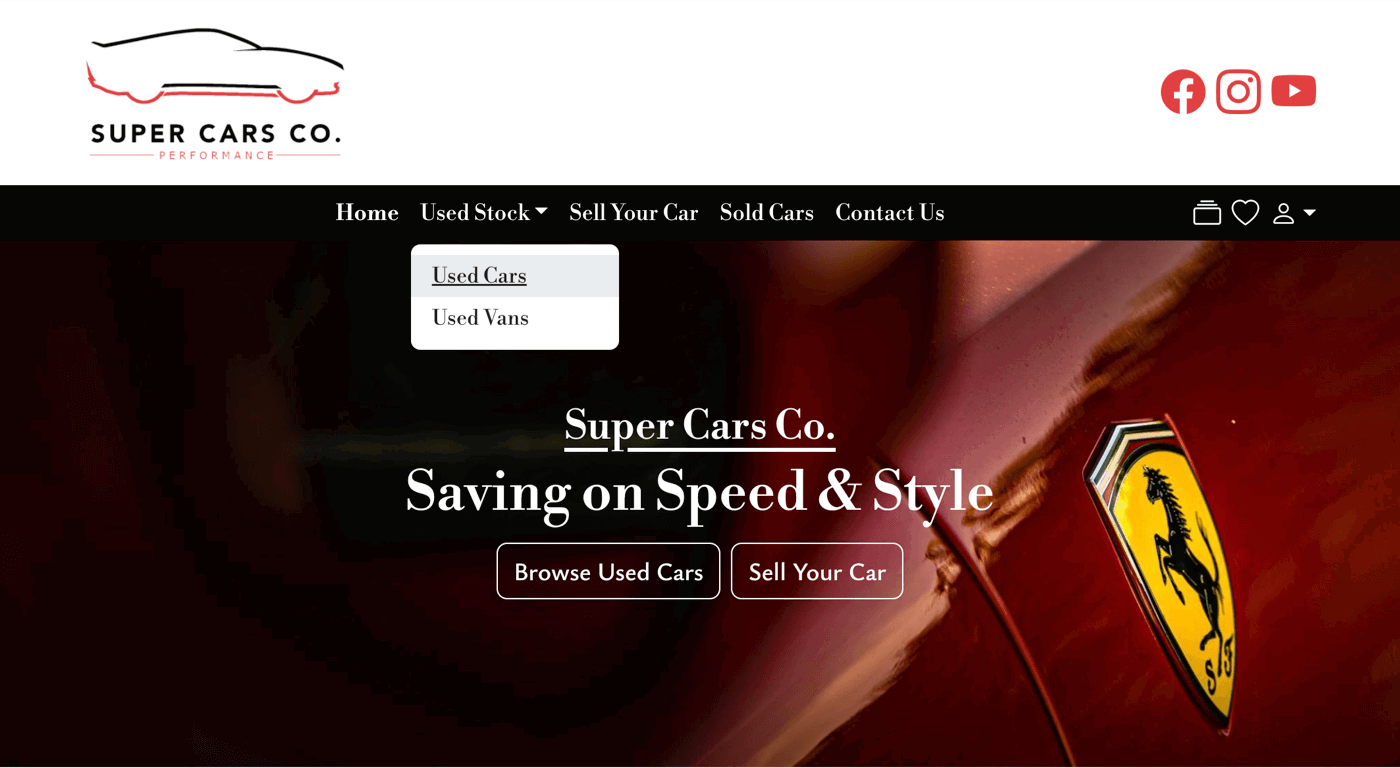
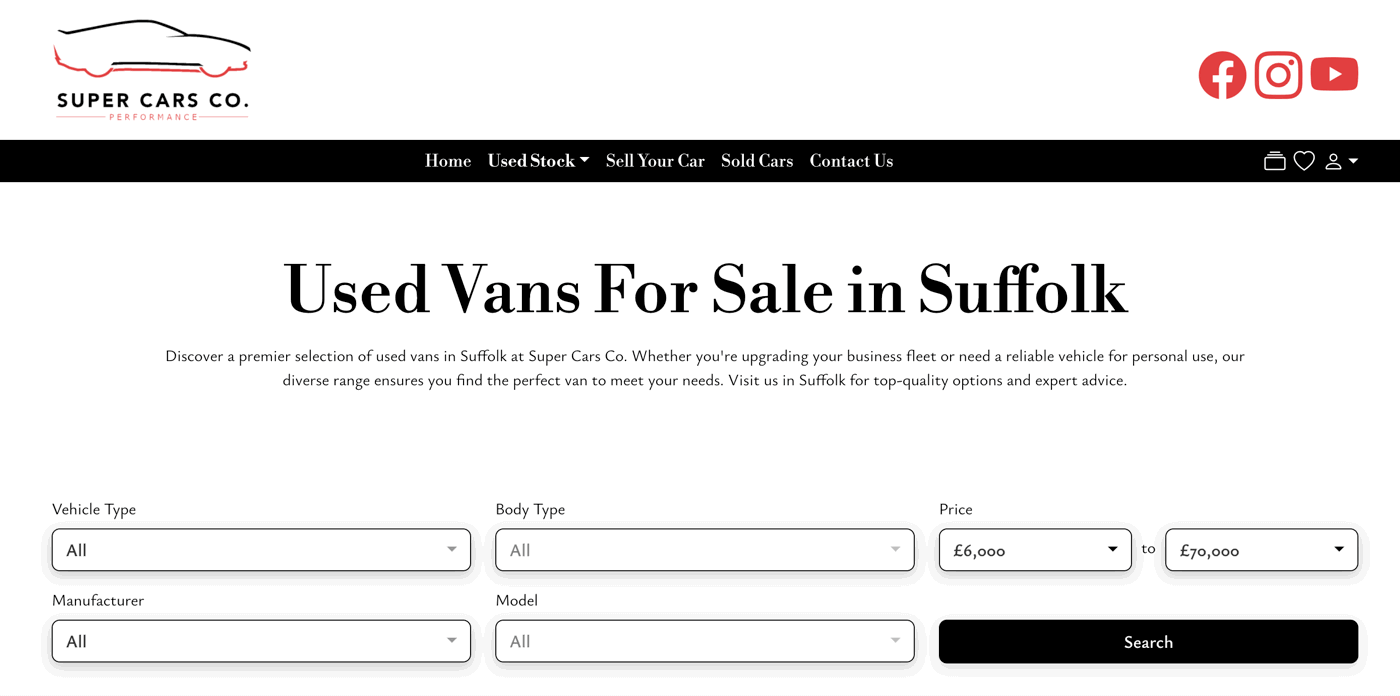
This will give you separate SEO pages for each vehicle type. As you can see here, there is now an SEO-optimised page for VANS too.
The vehicle types available are determined by what you've ticked in your Website -> Settings -> AI SEO section.

Navigation Header
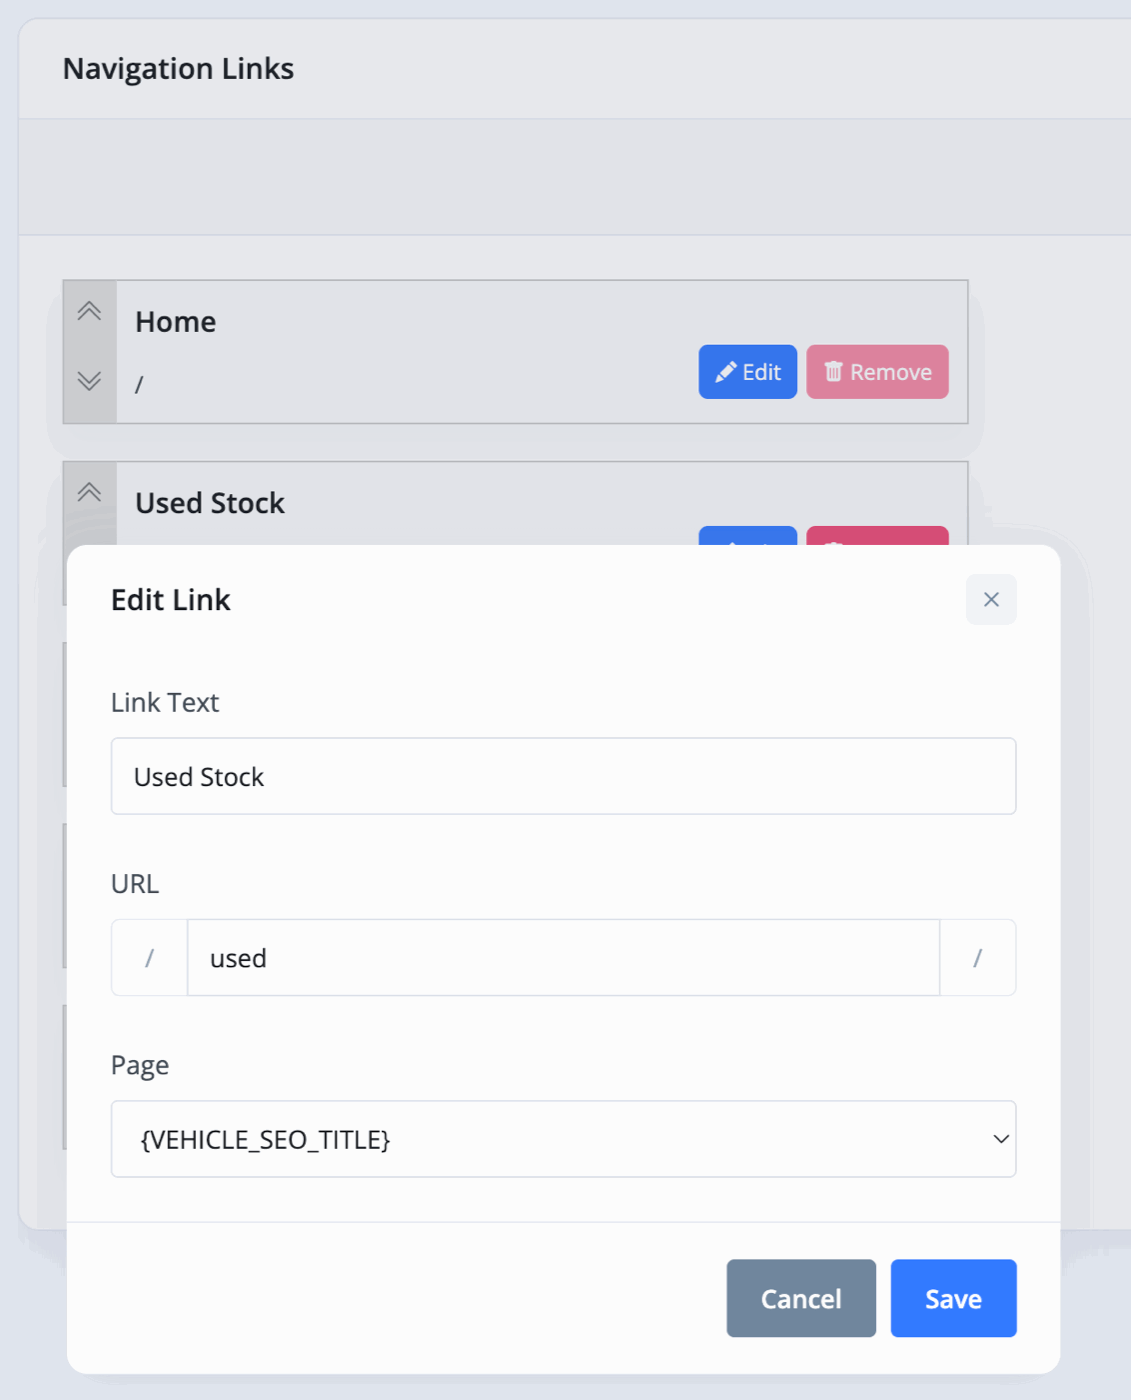
Start by going to your Website -> Navigation section and edit your current 'Browse Vehicles' or 'Used Stock' page.
Change the URL to 'used' and the Page to '{VEHICLE_SEO_TITLE}'.
Subheadings
In the 'Add Link' section, create a link for each vehicle type, setting each one as a 'Child Of' your Browse Vehicles page (for example, Used Stock).
Make sure that each link has Page set to '{VEHICLE_SEO_TITLE}'.
You can copy the two examples below:
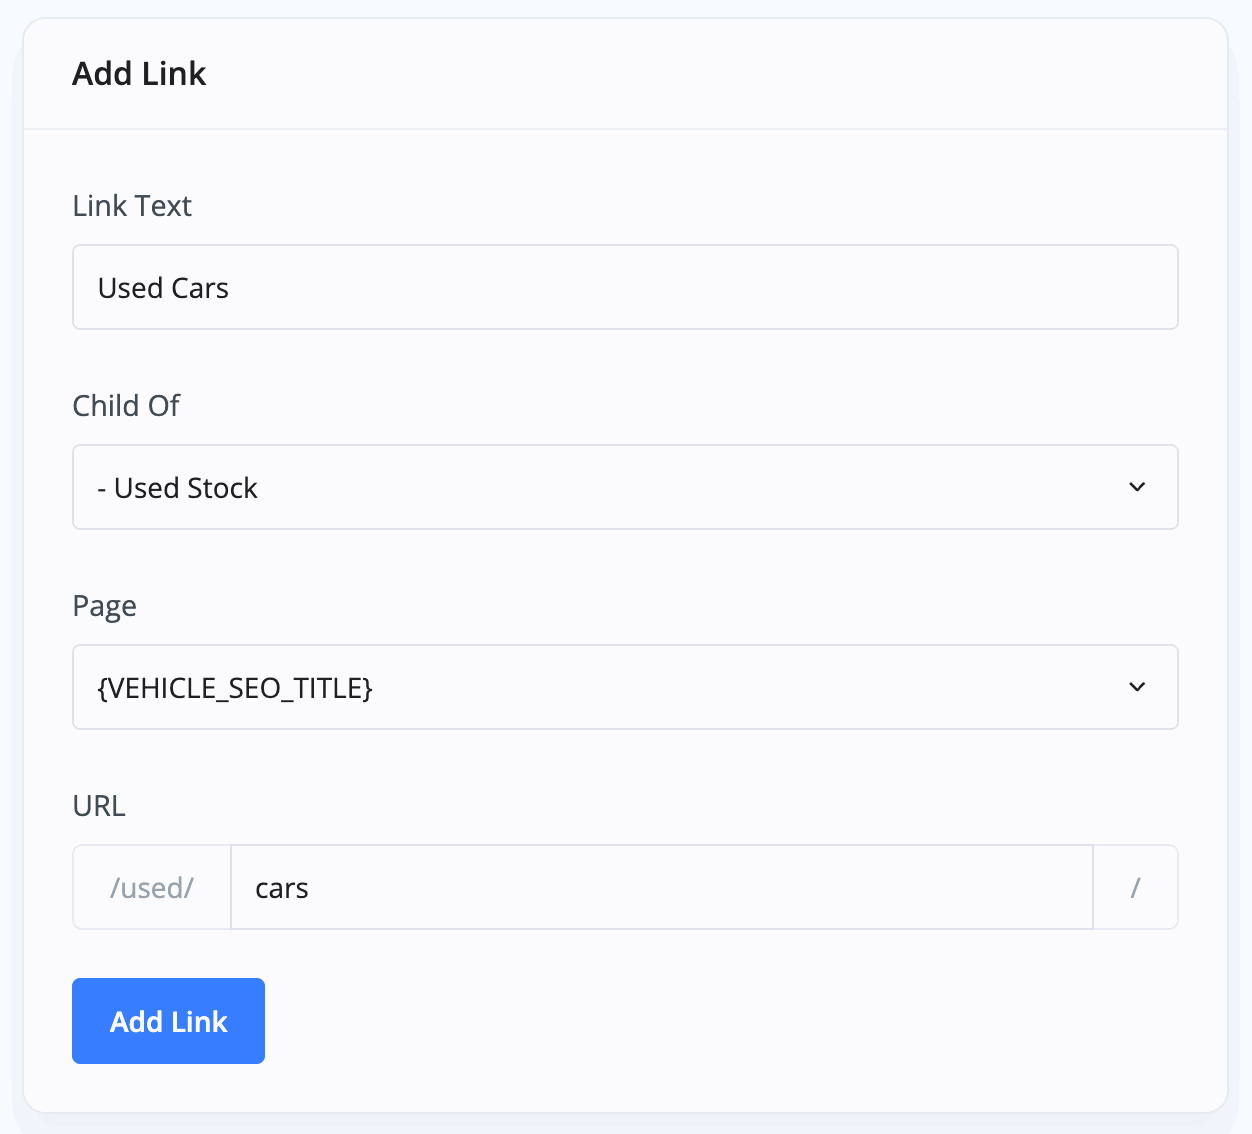
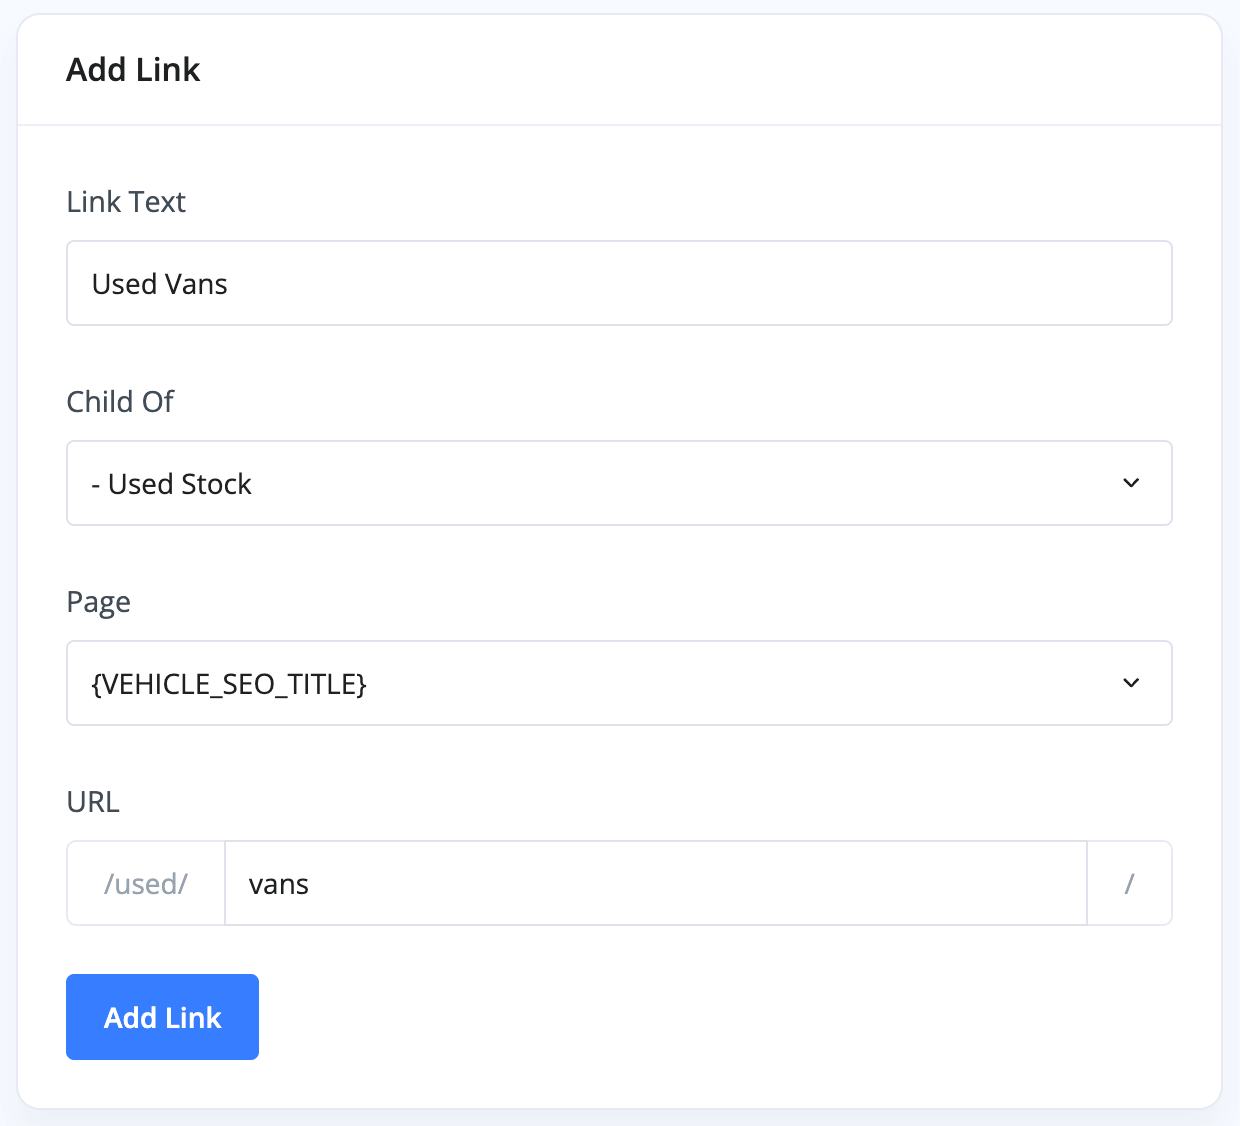
The final step is to make sure the URL just says the vehicle type in question, i.e cars or vans.
Must Do Checklist For SEO Links
- Create links as 'Child Of' your Browse Vehicles page, whatever you've named it.
- Set 'Page' to '{VEHICLE_SEO_TITLE}'.
- Make sure the URL simply reflects the vehicle type - motorbikes, cars, caravans, crossovers, motorhomes, vans etc.
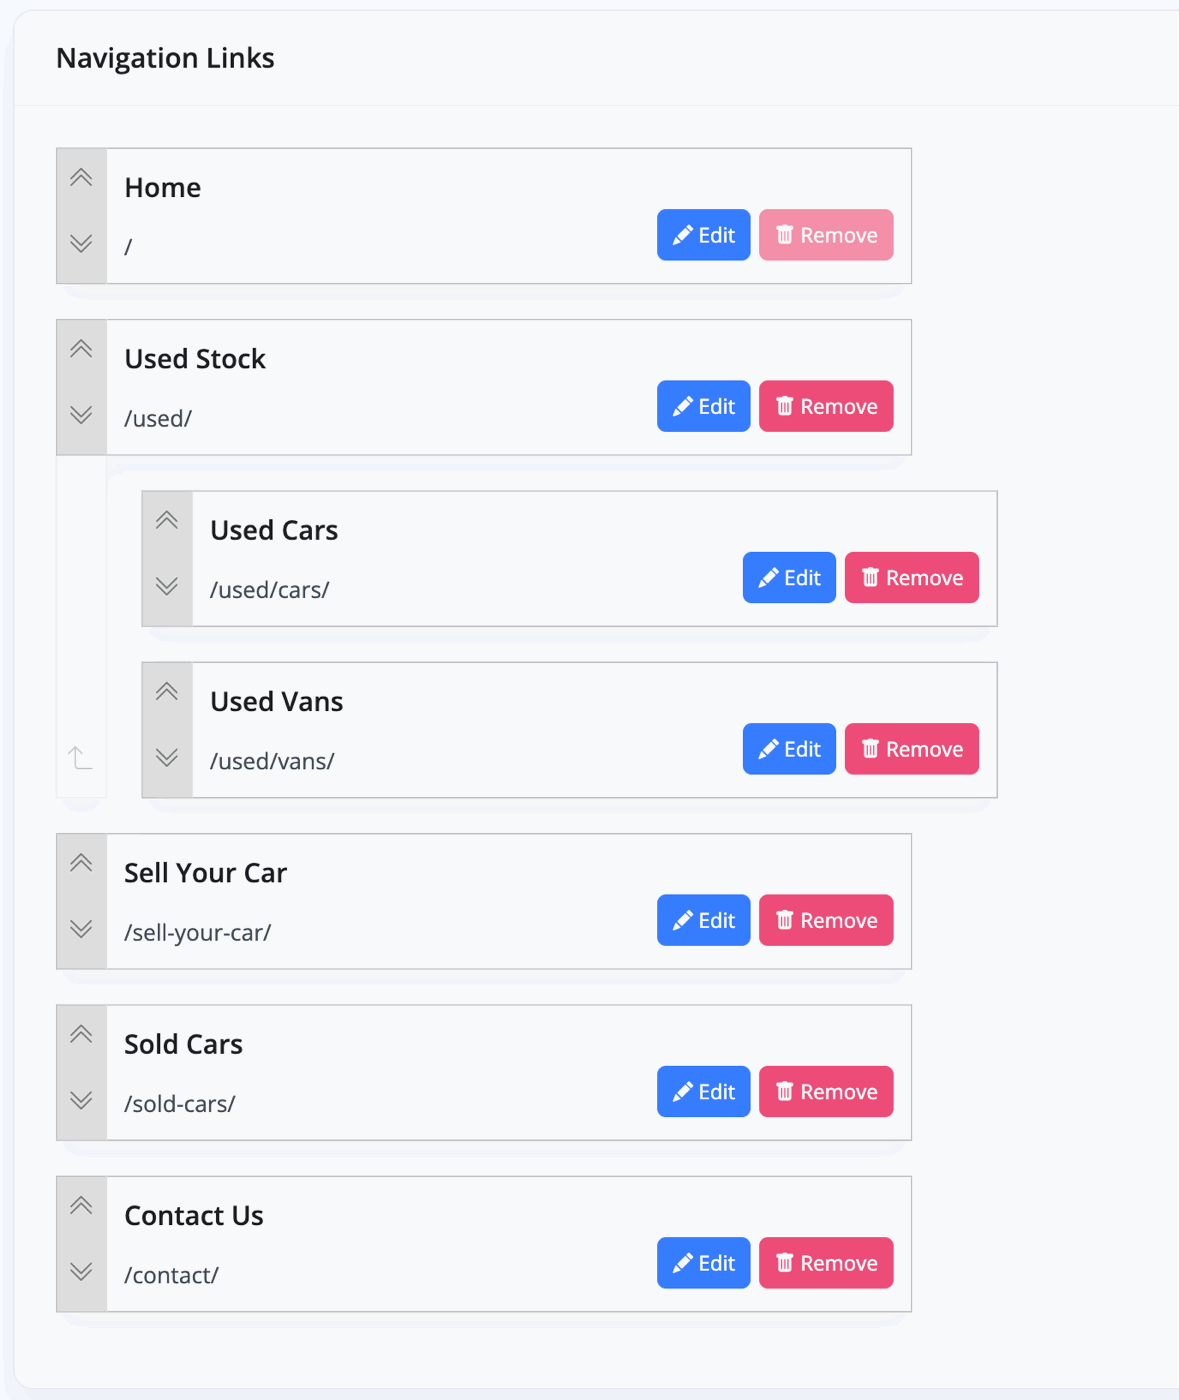
Once you press 'Save Changes', you should have something that looks like this.
Related Documentation
Usage Guide
- Account Alerts & Sales Channel Error Notifications
- Adding & Managing Contacts (Customers & Suppliers)
- Adding A Vehicle
- Adding Appointments To Your Calendar
- Adding Pre-Defined Products & Services
- Adding Website Pages & Navigation Links
- Adding Website Tags
- Aftersales Invoices
- AI Lead Assistant
- AI SEO Search Results Explained
- Batch Invoice
- Booking Types & Website Booking Forms
- Branding Your Website
- Browse Vehicles
- Business Contact Details (Telephone & Social Media)
- Business Details (Address, Legal Name & Company Number)
- Business Follow-Ups - Automated SMS & Emails To Customers
- Business Opening Hours (and Holiday Closures)
- Business Social Networks
- Business Users & Roles
- Cancelling A Vehicle Sale or Reservation
- Changing Vehicle Registration (Number Plate)
- Changing Your Membership Plan
- Connecting Finance (iVendi, Codeweavers, CarFinance247 & Evolution Funding)
- Connecting Third-Party Services
- Creating Invoices (Simplified)
- Creating Invoices, Purchase Invoices & Orders
- Custom Website Categories
- Customer & Courtesy Vehicles
- Deal Builder
- Display A Different Business Address In MotorDesk
- Displaying Announcements With Website Banners
- Editing Auto-Generated Content In MotorDesk
- Editing Website Pages
- Exporting Business Data
- Filtering Junk Leads
- Handover Process
- Historic Data Viewer
- How MotorDesk Integrates with Sage, Xero & QuickBooks
- How to Add an AA Dealer Promise/Warranty Page
- How To Change Your Website Images
- How To Enable Online Reservations
- Importing Business Data
- Importing Your AutoTrader Stock
- Initial Website Set-Up & Picking A Website Template
- Invoice Customisation
- Membership Payments
- Membership Plans, Data Charges & Payments
- Navigating MotorDesk & Your Dashboard
- OCR (Automatic Invoice Reader) Help
- Remove A Vehicle
- Sales Leads & Chat
- Sales Reports
- Selling A Vehicle
- Selling Multiple Vehicles At Once
- Sending & Signing Documents
- Show Sold Vehicles On Website
- Taking Deposits & Part Payments In MotorDesk
- Un-Publish A Vehicle
- Updating Your Contact Details
- User Profile (Change Email & Password)
- Vehicle Analyser
- Vehicle Appointments
- Vehicle Check
- Vehicle Checklists
- Vehicle Competitors
- Vehicle Condition Reports
- Vehicle Details
- Vehicle Documents
- Vehicle Finance Invoices
- Vehicle History
- Vehicle Image Templates
- Vehicle Images & Videos
- Vehicle Import
- Vehicle Job Boards
- Vehicle Leads & Orders (Leads & Deals)
- Vehicle Locations
- Vehicle Optional Extras, Features & Descriptions
- Vehicle Overview
- Vehicle Photo Background Removal
- Vehicle Purchase & Costs
- Vehicle Quick Check
- Vehicle Reservations
- Vehicle Settings
- Vehicle Silent Saleman
- Vehicle Specification
- Vehicle Stock & Price
- Vehicle Test Drives
- Vehicle Workflows
- Vehicles For Sale Limit Reached
- Vehicles Settings
- Vehicles Stock Book
- Website AI SEO
- Website Banner Settings
- Website Blog Articles
- Website Customer Reviews
- Website Deal Builder Settings
- Website Header & Footer
- Website Live Chat Settings
- Website Settings
- Website Statistics
- Website Valuation Settings
- Website Vehicle Search Result Design